You will need a computer running macOS >= 15.0 (Sequoia).
Installing Panaudia Link will add these things to your computer:
- An app in the Applications folder
- App data in ~/Library/Containers/uk.co.glowinthedark.panaudia-link
- An audio driver in /Library/Audio/Plug-Ins/HAL/
- A Network Extension
- A Virtual Private Network
Install from .dmg
Download the .dmg file from our software page and open it:
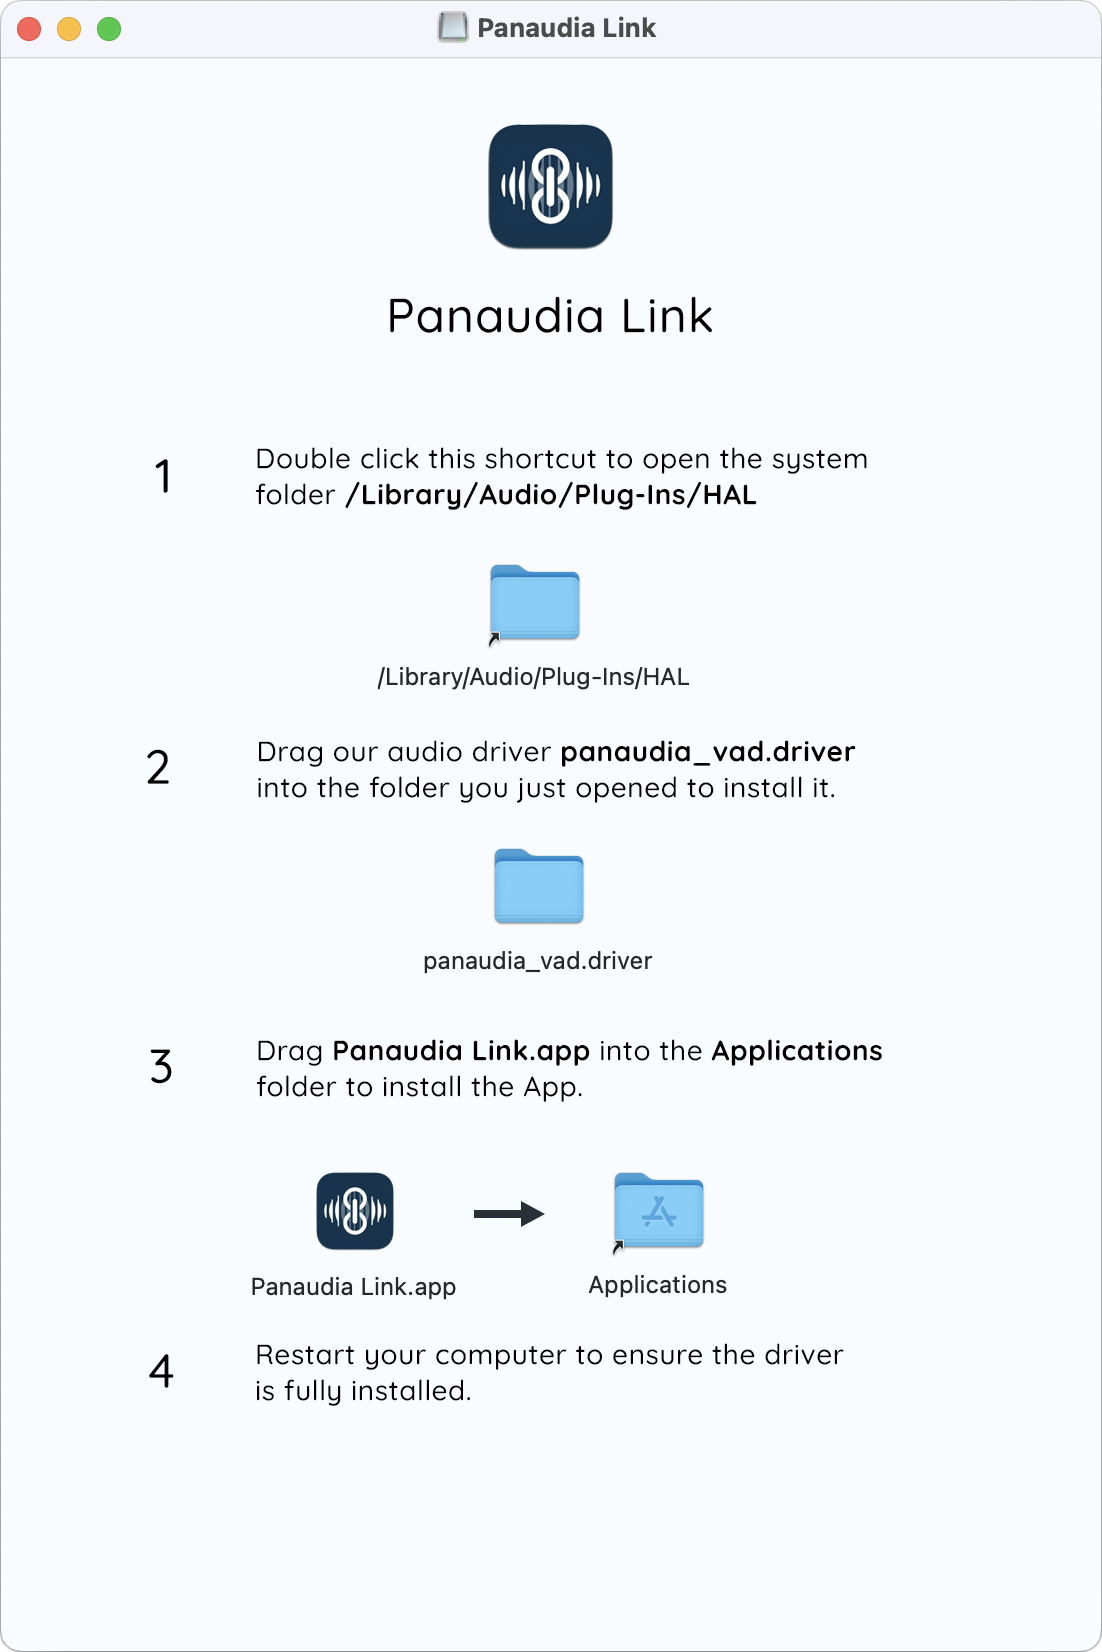
Install the Virtual Audio Device driver
- Double-click the shortcut to open the system folder /Library/Audio/Plug-Ins/HAL
- Drag the driver panaudia_vad.driver into this folder to install it. (Apple is extra careful to protect system folders like this so you have to open the folder first and drag the driver in rather than just drop the driver onto the shortcut.)
- You will probably be asked for your password to confirm that you want to install the driver.
Install Panaudia Link app
- Drag the Panaudia Link.app into the Applications folder.
Restart your computer to ensure Core Audio finds the driver correctly.
VPN Permissions
Panaudia Link connects to Spaces through secure Virtual Private Networks, each Space has its own unique network. This provides a very high level of security, with end-to-end encryption of all audio and data streams.
There are inherent risks in installing any new VPN on you computer. If you have any security concerns, or would like details about exactly what our VPNs do, and don't do, please get in touch.
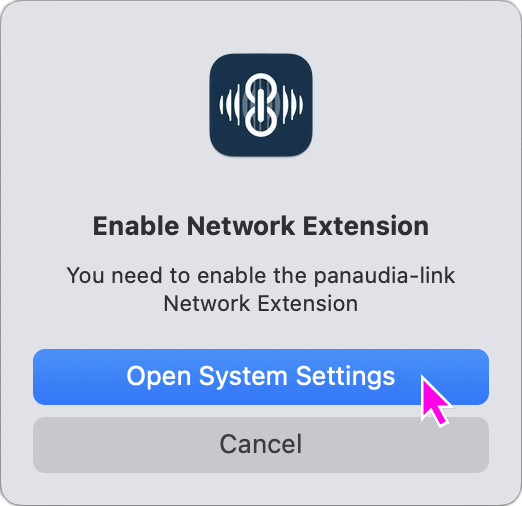
Enable the Network Extension
When you first run Panaudia Link it will install a Network Extension called panaudia-tunnel which manages our VPNs.
You will see a system alert something like this. You need to click "Open System Settings".

Which will open the Network Extensions settings window:
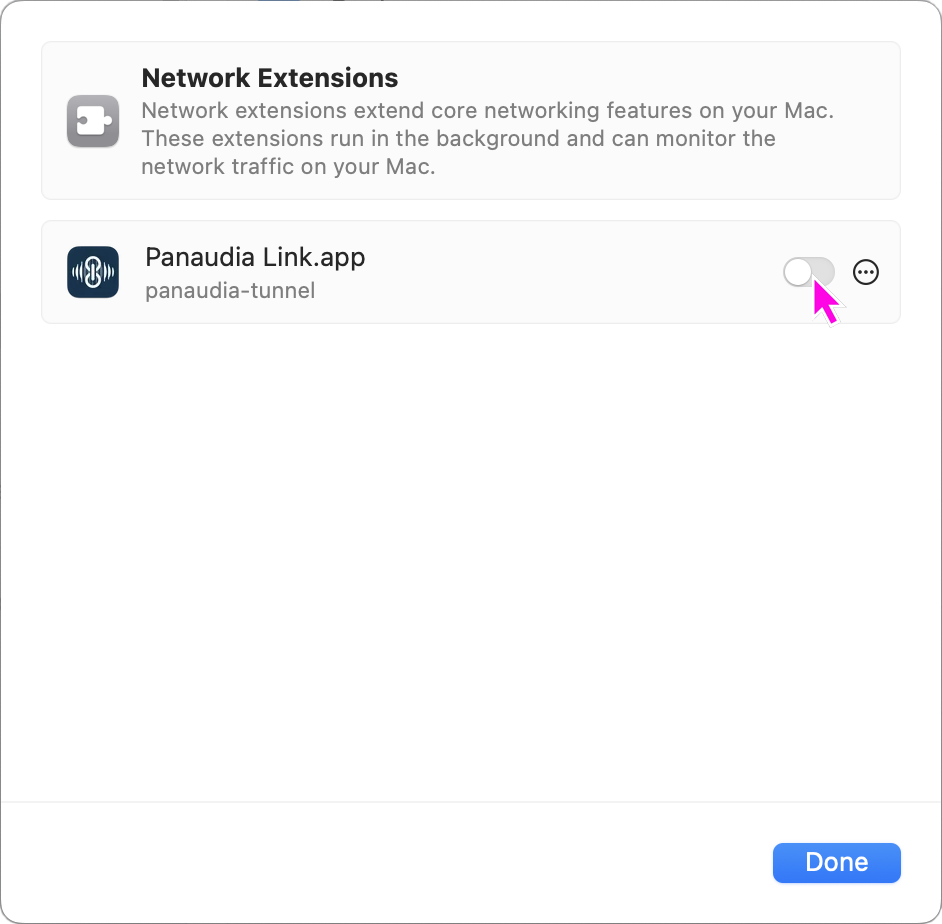
You need to flip the toggle to enable the extension and then click "Done"
If you missed out either of the previous two steps (very possible as Apple's UX is poor here) we have added an extra window to remind you to enable the driver:
Click "Open System Settings", scroll down to "Network Extensions" and click the grey info icon to open the Network Extensions settings window.
Allow Panaudia Link to create VPNs
When you first click "Connect" in Panaudia Link, to connect to a Space, the Network Extension will try to create a new VPN. You will see a system alert like this. Click "Allow" to let the app create a new VPN.
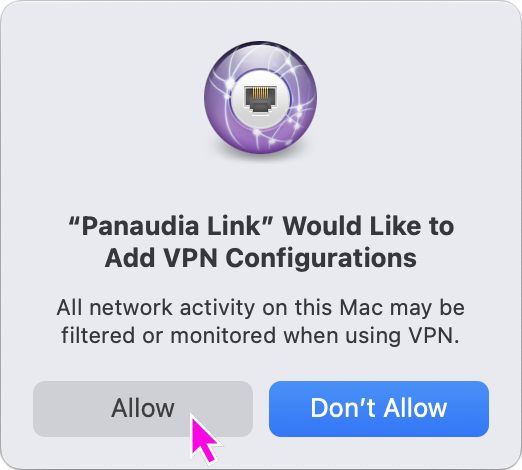
Every time you connect to a new Space the VPN's configuration will be updated, as each Space has a seperate network, but you will only be asked for permission the first time.
Uninstall
You can completely remove Panaudia Link from your system:
- Delete the application Panaudia Link from your Applications folder.
- Delete the application's data by deleting the whole folder ~/Library/Containers/uk.co.glowinthedark.panaudia-link.
- Delete the audio driver panaudia_vad.driver from /Library/Audio/Plug-Ins/HAL/.
- Go to "System Settings > VPN" click on the little grey info icon next to the Panaudia Link VPN, and select "Remove Configuration" in the pop-up window.
- Go to "System Settings > General > Login Items & Extensions", scroll down and click on the little grey info icon next to "Network Extensions". Then click on the small grey menu button on the panaudia-tunnel extension and select "Delete Extension".
- Restart your computer to ensure that both the audio driver and network extension are fully removed.